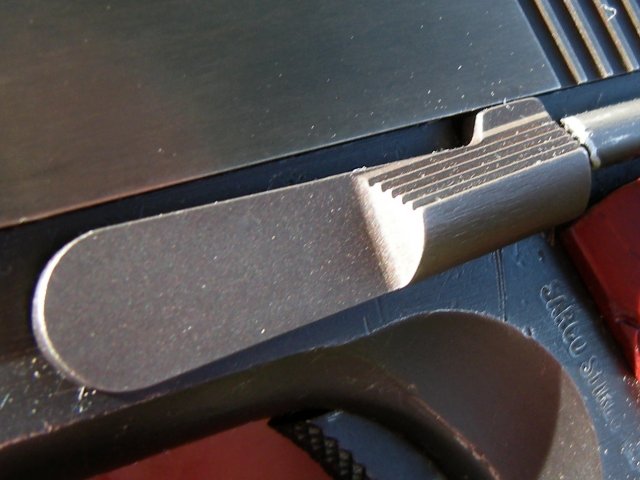
|
|
Copyright
©
A.D. 2008–09
by M. D. Van
Norman.
|
|
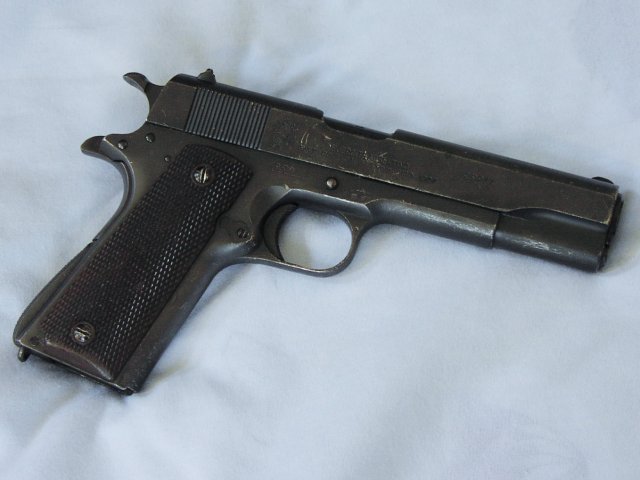
The Argentine m1927 is an example of the
widespread popularity of the Colt-Browning design.
|
I suspect
that there are two primary reasons for
this enduring popularity. First, the .45-ACP cartridge is perceived to
be a
potent handgun round, which appeals to shooters who obsess over the
“stopping power”
of their firearms. Second, the short, single-action trigger makes
accuracy with
the pistol fairly easy to achieve.1
Add in the long service life of the U.S. m1911
series and the irrepressibility of American pride, and you have a
recipe for
success.
While my assessment of the Colt-Browning platform may be more
objective, I can still appreciate the innovation represented by the
basic design, constrained as it was by what were essentially
19th-century military specifications. The idea of building my own
version was also very appealing. Well-worn U.S. m1911s can easily fetch
$1,000 or more, so when the opportunity to purchase a comparatively
inexpensive Argentine m1927, Sistema Colt, pistol presented
itself, I jumped at the chance.
The Argentine model of A.D. 1927 was a licensed
copy of the Colt system (U.S. m1911A1), though the first 10,000 units
were manufactured in Connecticut. These pistols were produced until A.D. 1966 and were almost completely identical to
their U.S. military counterparts.2
My m1927 was made in Argentina in A.D. 1951 and
exhibited plenty of scratches and cosmetic wear, but mechanically it
appeared to be in excellent shape.
|
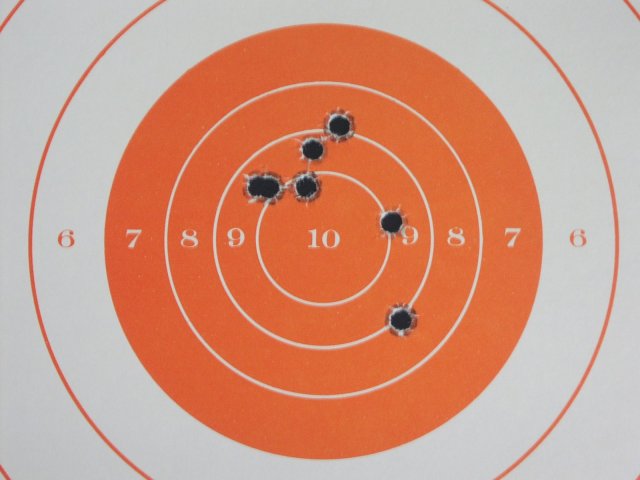
At about seven yards, I was still able to
place shots within a three-inch circle with my unmodified m1927 pistol.
|
Once I found the time, I
headed to the local shooting range to give my m1927 a quick function
check with a variety of ammunition, including round-nose, flat-point,
and hollow-point bullets. I went through four magazines without any
real trouble. I had one failure to feed with the hollow points, but
that appeared to be a problem with an unidentified magazine.
Accuracy was fair, given that I was out of practice and
that the pistol suffered from a heavy trigger and poor military sights.
I was
able to group my shots within a three-inch circle at defensive ranges.
The shots were consistently high but centered horizontally, which was
very encouraging. Compared to the baseline performance of my .45-ACP
SIG-Sauer P220, however, the m1927 still needed a lot of work.
|
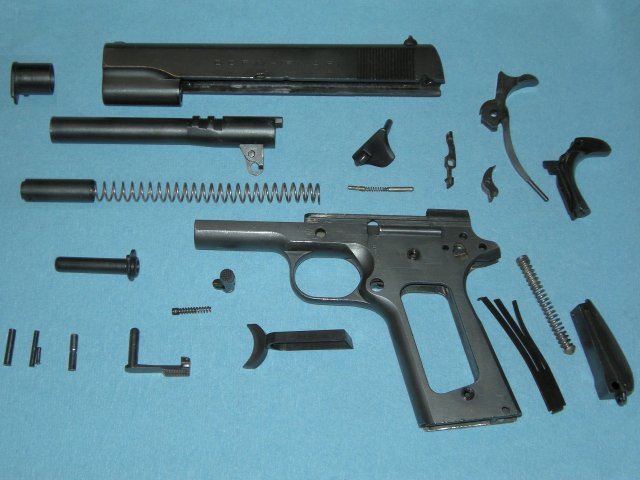
Despite a
lot of mostly cosmetic wear on the outside, my m1927’s internal parts
were in very good condition.
|
My next step was to
completely disassemble the pistol for a detailed inspection and a
thorough cleaning. I used a few simple tools for the job, though it is
said that the Colt-Browning pistol can be used as its own toolbox. Once
I had it apart, I was pleased and a little bit surprised to discover
that the gun’s internal parts were in perfectly serviceable condition.
There was some honest wear, but nothing was close to being worn out.
I decided to rebuild my m1927 into my vision of a combat pistol, which
meant it
would need to be easy to hold, aim, and fire. The grip profile would
have to be reduced, the sights would need to be improved, and the pull
weight of the trigger would have to be lightened. As it happened, I
tackled
the heavy trigger pull first.
|
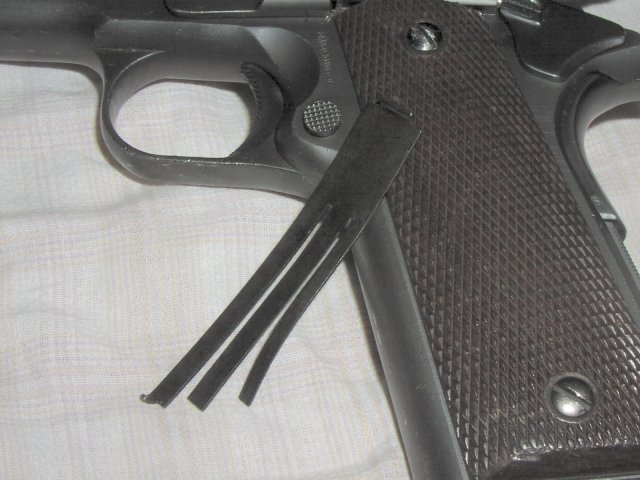
Replacing the sear spring brought the
trigger pull down to an acceptable weight.
|
While mercifully short,
the m1927’s trigger still required a
substantial amount of force to release the hammer. This didn’t hurt
leisurely, close-in
accuracy at the shooting range too badly, but it certainly made the
pistol more difficult and less comfortable to fire. I wanted to bring
the pull weight down to about four pounds, light enough to shoot very
easily but still heavy enough to require intentional effort.
A professional trigger job can cost hundreds of dollars and mostly
involves
the gunsmith carefully filing and polishing the hammer, sear,
and
disconnecter. However, my research indicated that there are two springs
that also affect the pull weight in the Colt-Browning system. The
mainspring propels the hammer
forward when the trigger is pulled, so some of its tension must be
overcome during the firing process. The sear spring engages the sear,
disconnecter, and grip safety, so it too resists the trigger
pull. Since the mainspring is also part of the recoil system, I decided
to leave it alone. I bought a light sear spring made by Cylinder & Slide,
accomplishing my
trigger job for about five bucks.3
|
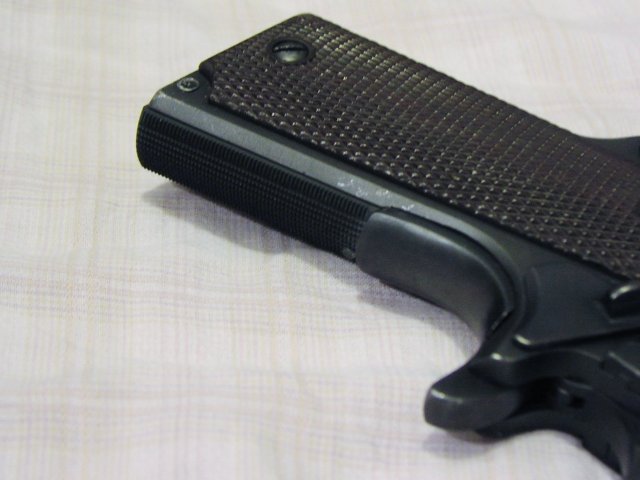
With some effort, I installed a flat
mainspring housing to reduce the size of the m1927’s grip.
|
At the same time, I
started to minimize the grip profile by replacing
the arched mainspring housing with a flat one. I purchased a drop-in
housing made by Wilson Combat
and quickly realized that I would still have to
fit it to my pistol by hand to prevent it from binding the grip safety.4 My
existing hobby files
weren’t well suited for the task, but I was able to get the job done
after a few hours of diligent work.
To complete this process, I bought a pair of slim grip panels from the Cocobolo Supply Company. Their
installation wasn’t any easier. The original grip-screw bushings were
staked in, so I had to remove them carefully to avoid damaging the
frame. Using a special driver bit from Brownells and applying slow but
steady force, I was able to get the old bushings out successfully.
Once the new bushings were in place and secured with Loctite Threadlocker,
installing the slimmer stocks was
easy enough. Half-checkered, “ranger”-style panels retained the
functionality of
checkering without giving the pistol the appearance of either a
military sidearm or a presentation gun. Combined with the flat
mainspring housing, they reduced the grip profile by a quarter of an
inch in circumference.
|
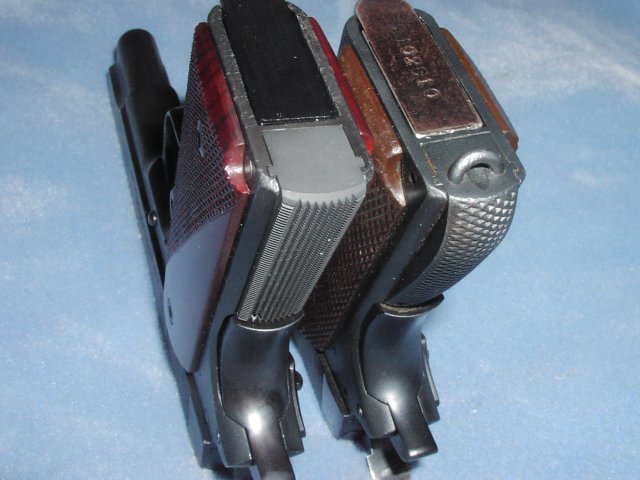
Compare the
slimmed-down m1927 on the left to the unmodified pistol on the right.
|
The next improvement was significantly more expensive. A
combat handgun should be able to be
aimed quickly and effectively even in low-light conditions, so tritium
night sights were a required upgrade. I lacked the experience and
the
equipment needed to properly install sights on a Colt-Browning pistol,
so in addition to buying the sights, I would need a professional
gunsmith to install them.
After weighing my options, I decided to purchase a new Caspian Arms slide cut for the
popular Novak sight system.
This allowed me to preserve the original slide and to benefit from more
modern metallurgy. However, the Caspian
design necessitated a new
firing pin and firing-pin stop, so I went ahead and replaced the
extractor as well. I also added an extra-power firing-pin spring from Wilson Combat to provide a
small
measure of safety should the pistol ever be dropped.5
Assembling the new slide required quite a bit of file work on the
firing-pin stop and just a touch on the extractor. Everything seemed to
fit together correctly, but I eventually made another trip to the range
to verify this. Using new magazines, I went through the same variety of
ammunition as before without any trouble whatsoever.
|
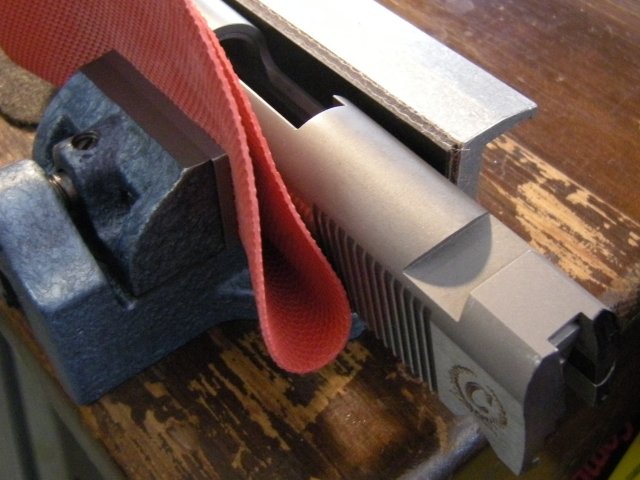
The new Caspian slide required some
additional fitting to match my pistol’s frame more closely.
|
However, the Caspian
slide was not a perfect match to my
m1927 frame. There was a slight overhang at the rear, so I decided to
shorten the slide for a better fit. This meant I needed to buy more
tools, but eventually I marked the slide, loaded it into a table vise,
and went to work with a mill file.
I worked very slowly in order to maintain the original contours. After
each pass of my file, I re-inked the back of the slide as a reference.
In this manner, I eventually cut my way down to the desired depth. I
finished the process with a couple passes from a hobby file and the
judicious application of fine sandpaper.
|
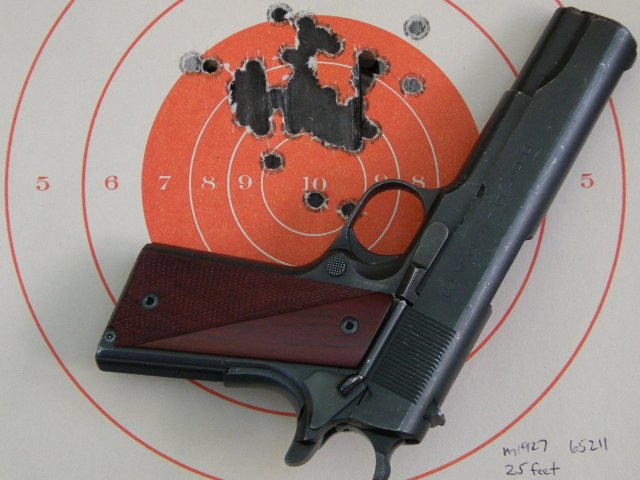
My m1927 saw very little change in
performance after the initial modifications.
|
Meanwhile,
I re-installed the original slide and made another trip to the range to
see how well my previous improvements performed. The results were
really no better than my first outing but were still acceptable.
However, after seven magazines, my right hand came away bloodied by
repeated blows from the long hammer spur … which made me reconsider my
$5.00 trigger job.
|
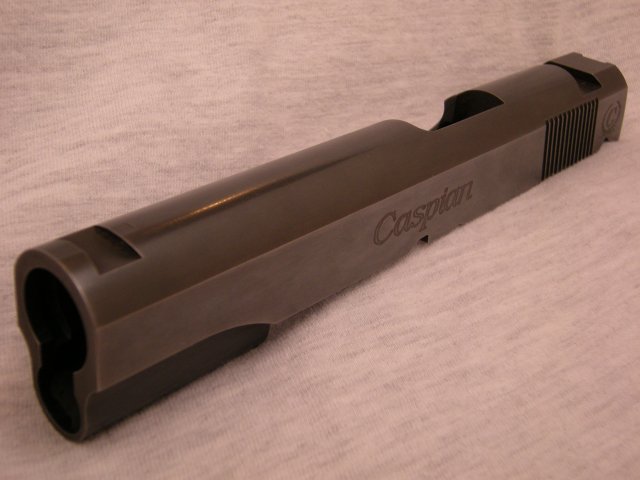
The Caspian slide had an acceptable finish
after two applications of cold bluing solution.
|
With the rear of the slide and the frame blended to my
satisfaction, I prepared the slide for finishing. I used fine sandpaper
to smoothen the steel, to soften the sharp edges, and to remove a few
small scratches. I followed this with my trusty pot scrubber,
burnishing the surface to a pleasant sheen.
I then blued the slide in a two-step process. First, I heated the slide
in the oven and quickly applied a coat of Brownells Oxpho-Blue with cotton
patches. I let this cure overnight, but after I cleaned and burnished
the steel again the next day, I noticed that the dark-gray finish had
some prominent streaks.
For the second coat, I switched to Birchwood Casey Super Blue.
This left the slide a deeper black, but the streaks were still visible
upon close inspection. Since I wasn’t trying to win a beauty contest
with this pistol, I decided that this was good enough, packed up the
slide, and shipped it off to Novak
Design for sights.
|
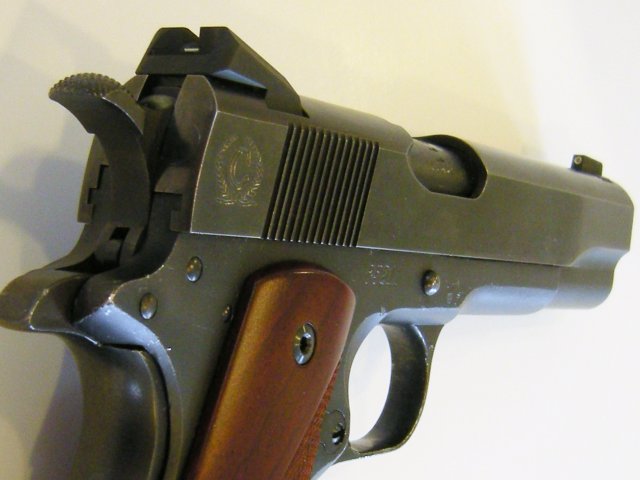
I installed the Caspian slide, now
equipped with Novak low-mount night sights.
|
Two weeks
and $200 later, my slide returned with tritium sights in place. I chose
the bar-dot configuration on the theory that the different markings
would enable quicker acquisition and alignment of the sights under
stress. The installation job itself appeared professional and secure.
I was ready for another trip to the range, but the thought of that long
hammer spur biting my hand continued to bother me.
|
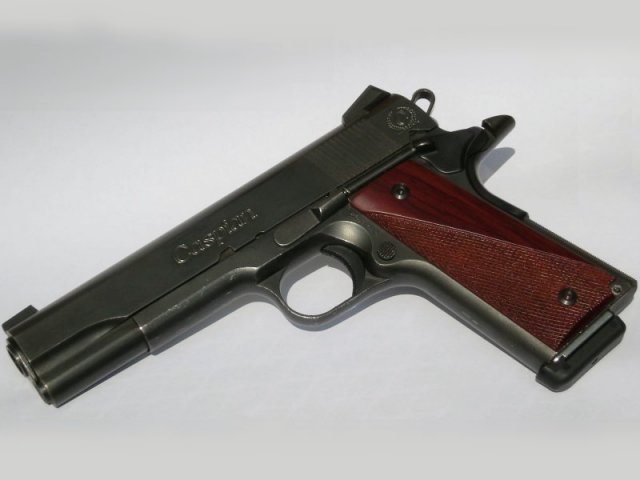
I further upgraded my FM-Caspian m1927
with a Cylinder & Slide trigger-pull kit and a King’s grip safety.
|
So I
installed a Cylinder &
Slide trigger-pull kit that I had previously blued. Rated at four
pounds, the kit gave the pistol a crisp, relatively light trigger pull.
I paired the new hammer with a King’s
Gun
Works grip safety, though I had to tweak the sear spring to
keep the safety from flopping about.
|

At 25 feet, I shot a 2.25-inch group with my FM-Caspian.
Note the four-round “cloverleaf” in the 10 ring.
|
Once the
weather cooled down, I took advantage of a furlough day and headed to
the shooting range. While I wasn’t expecting any major improvements in
accuracy, I did manage a 2.25-inch group with premium Winchester
hollow-point cartridges. After the hollow points, I tried
flat-point and round-nose ammunition in a variety of new magazines.
I experienced only two minor problems. The slide twice failed to return
to battery with Ed Brown
magazines and also failed to lock back on Chip McCormick magazines. The
former problem will probably resolve itself after
a
couple
hundred
more
rounds, as the new
components wear into the the gun. The latter is probably indicative of
a worn slide stop, which I will eventually have to repair or replace.
But my hands came away unscathed.
|
|
I
swapped the original slide stop for a heavy-duty replacement from
Evolution Gun Works.
|
After some
experimentation, I decided to change out the slide stop. Evolution Gun Works provided a
heavy-duty replacement, which seemed to resolve the lock-back problem.
Another trip to the range validated this conclusion, and I was able to
run through 10 different magazines from four different manufacturers
without a single malfunction.
I was also pleasantly surprised when I turned in a tight group with my
first magazine. Other than making the pistol easier to shoot, I haven’t
done anything to intentionally improve its accuracy, but this group
showed that the gun can do its part when I do mine. However, my shots
have been drifting to the right and are no longer consistently
centered. This is probably due to incorrect finger placement on my
part, but I can’t rule out a mechanical cause without further testing
at the range.
|
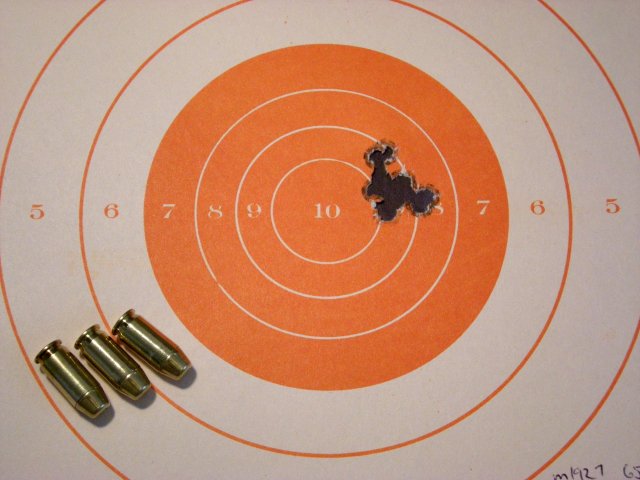
This eight-round, 1.06-inch group
demonstrated the potential accuracy of my FM-Caspian pistol.
|
After more than two years
and 500 extra dollars, this project is effectively done. Without making
any permanent modifications, I transformed a well-worn relic into a
modern combat pistol,6
ready once again to defend life and liberty.
During this process, I gained a new appreciation for the Colt-Browning
platform embodied by the U.S. m1911 series, by the Argentine m1927, and
by the host of commercial variants still being manufactured today.
In fact, the enduring popularity of the 1911-style pistol turned out to
be its best feature. The wide variety of replacement parts available on
today’s market gave me the opportunity to build the pistol that I
wanted. Even the lament from Col. J. D. Cooper that I quoted at the
bottom of this page no longer applies.
|
1
|
The
first time I fired a 1911-style pistol, I was quickly shooting the
centers out of my targets at seven yards, albeit with a well-tuned
Smith & Wesson Performance Center model.
|
2
|
Besides
their different markings, there are supposedly only two external,
cosmetic differences between the U.S. m1911A1 and the Argentine m1927
pistols.
|
3
|
The light sear spring worked very well on this pistol, but I
have had less spectacular success on other examples. To achieve a
similar result with an earlier
m1927, I had to install a drop-in trigger-pull kit from Cylinder & Slide, which
was significantly more expensive.
|
4
|
Pressing
the grip safety disengages the disconnecter, allowing the trigger to
act on the sear, which holds the hammer in the cocked position. |
5
|
The
basic Colt-Browning design lacks a firing-pin block, so an unmodified
pistol can potentially discharge if dropped. The danger is remote, but
simple precautions should be taken to mitigate this risk. |
6
|
Such
a weapon doesn’t exist, except in the narrowest of contexts.
Conventional wisdom holds that no one would choose to fight with a
handgun, but civilian shooters also won’t find themselves with
select-fire carbines and on-call reinforcements.
|
|
|


